

After a few tries and mishaps, here is what I ended up doing:


Then to provide a bit of stablization for the web 'threads', I quilted a grid back and forth over the design area. I should have used a different color so you could see it better, but that would have meant making more than I already did! Don't forget this step or your web will be so hard to handle, it isn't even funny! Ask me how I know! ;)

For the next step, I used 12 weight Sulky thread (you could use a heavy top stitch thread as well), an embroidery needle (size 16), and a triple stitch (sometimes called a 'jean stitch' on your machine. It takes one stitch, goes back one and then a second forward stitch, putting 3 stitches in one place). I stitched on all my Sharpie lines.
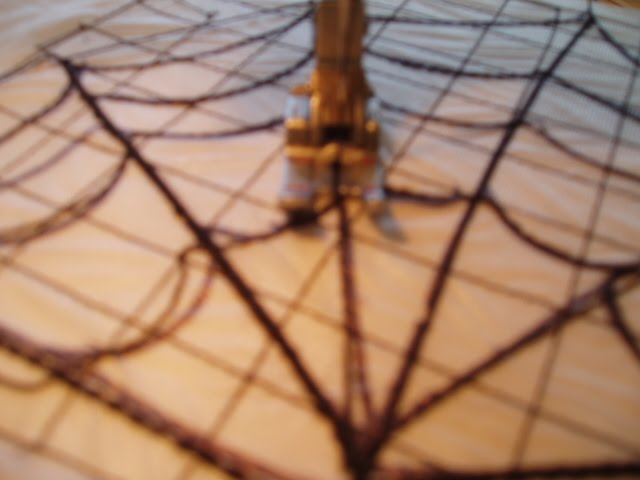
Blurry picture, but it was the best one of the ones I took. But you get the idea. Now the fun part! Go to the kitchen sink and start running water on the web and like magic the paper and solvy disappear!

It ends up being a gooey mess, but keep on rinsing until all of the 'goop' is gone.

Actually I left a TINY bit in to give the web just a bit of body. But just a little.

I laid it out to dry, spreading all the webs out nice and flat.

Once it's dry (okay, I'll fess up..I couldn't wait that long, so towel dried it the best I could!), lay it on your quilt, and using a small zig zag stitch, secure it down in several spots. I didn't go over all the webs, I just tacked it down. I wanted a bit of a 3D look. After it was all tacked down, I went and cut out the 'grid' portions that help hold it together temporarily.

And voila! She's done and now has a home to hide in!

Looks a little rickety..but hey, spider webs in real life aren't perfect either.


4 comments:
Well done!! Thht washaway stuff is sew useful! I am currently stitching loads of coral and seaweed in a similar way! And teh spider certainly looks more 'at home' now.
I should have sent you the rest of the spool of "Glow-in the-Dark" thread. The spider web could have glowed along with the rest of the quilt.
How perfect!!!!! It is GREAT!
Cute idea! I was thinking about a spider web quilting design for a Halloween top. I think I will use your web drawing for inspiration.
Post a Comment