Thursday, January 27, 2011

A History of Dutch Quilts-- book review

In my last post, I referred to this book, "A History of Dutch Quilts" by An Moonen.   Taken from the back cover..
This book provides a comprehensive insight into the distinctive history of Dutch quilts. It becomes clear that Dutch quilts made a contribution to the development of quilts in the United States of America. The first Dutch inhabitants of New Amsterdam, which later became New York, brought quilts with them from their mother countries in the seventeenth century. Descriptions of these quilts can still be found in the emigrants' estate inventories that have been preserved in the New York State Archives in Albany."


I first saw this book while in Fries Museum, Leeuwarden, the Netherlands, but of course, in Dutch. I just was notified in December that it finally was available in English.  Being of Dutch heritage, it was extra special to me.  My grandmother was an exquisite quilter and sad to say, I'm the only descendant of hers that quilts. I often think of her when quilting and sometimes imagine her looking down upon me from heaven, grinning from ear to ear that not only do I quilt, I have close friends in the Netherlands and travel over there quite frequently.  I haven't learned to speak the language, maybe that's next on my plate.  Anyway..back to the book...

The first half of the book is dedicated to the history of how quilts came to be, the fabrics that were used, patterns used and techniques.  The last half of the book has a collection of quilts from various museums and collections.   One was a Patchwork coverlet from around 1830.  She states in her book, "Coverlets of this kind was referred to as a bedeldeken or 'beggar's coverlet', because it was assumed that anyone who had such a variety of printed cottons at her disposal could only have come by them by begging from others."  Isn't that funny?  Now we all have our own collections! 


 Just lots of beautiful little hexagon flowers... Quilt is 71 x 80 inches. 


Another one that totally intrigued me was a patchwork quilt from Hoogeveen around 1830 and is 81 x 101 inches. And although it doesn't say how many, there are thousands of hexagons!  And we thought the Japanese started that trend!

and a closer look...


isn't is cool how it is also kind of a colorwash look as well? 


I had a hard time getting a close up picture--with the overhead light glaring and trying to hold the book with one hand and hold the camera --as still as I can-- with the other hand!  But it does let you see the tiny little hexagons. They measure 0.9 inches! Whoa.  I love to do hexagons, but don't think I'll be going that small. 

If you are a history buff at all, or like to learn as much as you can about the history of quilting, the fabrics that were available at the time, this is certainly a great book to have. I'm just thrilled that they had enough interest to publish it in English.  After all, it is part of our heritage as well. In An's words, 

"This book is the long-awaited, lavishly illustrated review for quilters, quilt lovers and everyone interested in textile history."


Tuesday, January 25, 2011

Quilt fabric shopping in Europe

We stumbled upon a fabric store in Rotterdam -- about 2 blocks from the hotel! And this is my third year at that same hotel.  You would have thought I could have smelled it at least!  But we were just taking a stroll and noticed fabric in the window.  Walking in we noticed it was mostly dress making fabric. But then noticed some basement steps......and found the basement was full of cotton fabrics! Woo hoo! I got a batik, maybe for a purse or bag of some type. I resisted on any more.  What I liked though was that they had ALL kinds of colors and sizes of gingham check--in 100% cotton!  Most of our gingham here in the US is a blend with polyester. (great if you are making kids clothes, not great for quilters).  Here is what I bought...  never mind...nothing special and I forgot to take a picture of it. :)

In Amsterdam, we went to Den Haan and Wagenmakers..


 where they have authentic reproduction Dutch fabric..... for a price. :)  It is such beautiful chintz fabric.  I bought some a few years ago, and it's still aging in my closet, so I resisted. I did find a book that just came out in English that I've been waiting for, "A History of Dutch Quilts"  by An Moonen. I'm going to do a post later on this fabulous book. 


After the little detour on Saturday and not being able to get to the quilt shop in Antwerp, I told my friend Pat I would get her to a couple in Paris for sure! The first place I took here (in a few textile shops up by Sacre Coeur) didn't really pan out authentic French cotton fabrics. They are a much better price up there vs. the quilt shop. But since they had just a few in colors she didn't want, we toured the Basillica


                                                          and Montmartre (a neat artist's area)


 while we were there and then headed back into the city.

Stopped at Notre Dame, toured the church

 and the walked the couple of blocks to Le Rouvray.


 NOT open! In fact, with a sign on the door. Closed for remodeling.


And a map of where they are temporarily located. Yeah right! It looks SO easy--see the little arrows on the map and ici (here)?  There is not a straight street in Paris. Street signs are on the buildings. We tried to decipher the map, and ended up walking for 15 minutes. We decided to walk back to the shop, get the full address this time (smart, huh?) when we came upon the street! A very short street, but still no quilt shop. We walked back to get the address, and returned to the little street, which happened to be no more than 50 yards from the original shop! Found the address and peered in the gated windows, and yep...that was the shop all right. Closed today! I wonder if our husbands were behind this, we spent no money on fabric in two cities!

So, all in all, a cheap fabric buying trip! But so much fun in the search. And if you can't find fabric...buy pastries!


Au revoir!

Sunday, January 23, 2011

What country am I in?!!

Last Saturday, I was taking a small group of women and my granddaughter on a little side trip to Antwerp, Belgium. My husbands softball tournament was going on in Schiedam (outside Rotterdam)

(it was actually Cup 2011--but they already took that logo down!) and we decided there were better things to do! like go Diamond shopping (on one ladies agenda), seeing the old city and architecture (another's passion) or finding a quilt shop (guess who?)

Got online and bought our tickets the night before. Please note: do not take powerful painkillers the night before you need to go somewhere, especially if YOU are leading the group! I got up 13 minutes before we were to leave for the train station. We made it though. I double checked to see what platform we needed to be on, and away we went.


When our time to arrive in Antwerp came and went and we were not even close to the city, it kind of bothered me. Then we passed Eindhoven and a little voice in me said, hmmm, that's west of where we want to go. I started getting nervous by then. I tried to find the conductor..to no avail. 1 1/2 hours on the train, and no conductor to be found. I told the women that we needed to get off at the next station just to be sure. Next stop? Out in the                
                                                                 middle.  of.  nowhere.


with just a platform, no station. Next two stops, the same. Ahh, a station coming up! By this time, I KNOW we are on the wrong train. Brilliant, aren't I?

As we are waiting for the train to stop, an older gentleman came up to us and I asked him where we were? He looked at me a bit odd and I repeated the question. After the third time, I asked, a bit frantically, what country are we in? I was SO afraid we had gone to Germany! He looked at me and said, Holland. Whew! We hadn't left the country.

By that time the train stopped and then the conductor finally shows up! He looked at our tickets and said, you are on the wrong train! Yeah, no kidding! Where were you earlier?   We had to get off the train, wait for a train going back, get off two more stops, change two more trains before we finally arrived in Antwerp! 4+ hours late!


 And you know what? 5 more minutes and we would have been in Germany! We ended up in Venlo-      (-and to all my Dutch friends....do NOT laugh! I know there is nothing in Venlo. :)  )


We did get to eat at my favorite Argetinian Beef place. Let Suzi stay in the Diamond district and we headed down through the shopping areas, towards the old city (Grote Market) and De Kathedraal for Kim to do some sketching.


 But no time for Pat, Kajsa and I to find the quilt shop, Calico House. :(. Another trip.


The little green star on the right side of the map is the train station, and we walked along the green line to the circle, which is the old part of the city. You can see where Calico House is. Close enough, but not when you spent an extra 4 hours on a train!

So no quilt shop in Antwerp this year. But, we did get a Belgium waffle..nice and warm and yummy! Kajsa told me that I had a little bit of sugar on my face...and look who's talking!


And you can bet we were on the right train going home! What a quick fast ride. LOL

Posted using BlogPress from my iPad

Wednesday, January 12, 2011

Finding inspiration in....the bathroom?


It's amazing where you can fine inspiration for quilting designs, patterns,etc.!

At a friend's house yesterday, here is her toilet paper...


A Double Wedding Ring! A neat design in the center...


Keep your eyes open...wherever you are! Just sayin'


Posted using BlogPress from my iPad

Sunday, January 09, 2011

Magically Easy Pillowcases Tutorial

Whoever thought of this is a genius! I wish I could claim it, but I can't. Sadly I have NO idea where the idea came from originally. I've been making pillowcases like this for years. But let me show you just how MAGICAL these pillows are to make.  

Supplies:
7/8 yard  Main Pillowcase Body (multi color)
 1/3 yard Pillowcase End (use coordinating fabric) (red)
1/8 yard Contrasting Flange Trim (yellow)
Matching Thread
Rotary Cutter, Mat and acrylic ruler

I like to use flannel for pillowcases just because it's nice and soft and warm. But cotton is okay too.  Pre-wash your fabric, especially the flannel as it shrinks, as in... a LOT.  

Straighten the cut ends of your fabric and cut each pillowcase part.
Main Pillowcase Body: 27" x 44"  ( or width of fabric)
Pillowcase End: 10" x 44" (or width of fabric)
Flange Trim: 2" x 44" (or width of fabric)

 On the 2" wide trim piece, fold it in half lengthwise, Wrong Sides together and press.  

Lay your Pillowcase End fabric (the 10" piece) Right Side UP on the table. 


Next lay your Main Pillowcase fabric down, Right Sides UP, matching the raw edges along the top. (you cannot see the Pillowcase end piece now).


Lay the folded flange trim piece along the top, matching the raw edges of all pieces. 


 Now gently fold the Main Pillowcase fabric up, but not in the way of the top of all the matched pieces. It needs to be away from the bottom edge though.  


 Carefully pick up the bottom of the Pillowcase End piece and fold it over the top of all the layers and match the raw ends along the top edge. Be careful to not let any folds of the Main pillowcase fabric get in those layers.


  Pin along the top, making sure to use enough pins so all the layers do not shift.  You will be sewing a tube, with all the fabric inside the tube.  Sew the long edge with 3/8" seam.  

Turn right side out 


and press the Pillowcase End piece so it is flat, pressing the flange trim towards the body of the pillowcase. 


 Trim side edges to make them straight, trying to not cut off more than necessary. 


Fold the pillowcase in half, WRONG SIDES TOGETHER (yes, I know this just seems wrong, but trust me on this!)


 with the folded Pillowcase End piece on top, matching the seams along the sides. Pin down the long side and across the bottom short side.  Stitch with 1/4" seam allowance, matching the flanged trim area.


 Clip the bottom corners at an angle (close to the stitching, but not through it) edge to eliminate the bulk.  

 Turn the pillowcase wrong sides out, so the RIGHT side are together now. 


Press the seams flat, so there are no folds, making sure the seam is on the edge. 


 Now stitch with a 3/8 to 1/2" seam, so your inside seam is fully encased inside the new seam allowance.


Make sure to backstitch at the start and finish of your stitching. Turn right side out and Voila! A beautiful pillowcase that has no raw edge seams anywhere!


and guess who's been waiting in the wings waiting for HIS pillowcase?  

Now, wasn't that just MAGICAL?  

Saturday, January 08, 2011

A PJ Pillowcase Birthday Party

What a fun way to celebrate your 10th birthday!  


Miss Special K had her 10th birthday recently and her mom and her were trying to decide what they could do special for her birthday. She wanted a slumber party, but then what?  I suggested they make pillowcases.  10 is a good age to begin girls sewing (some are capable younger than that as well) and the bonus is that it can be done in an evening and they get to go home with a USABLE project.

K and I went to JoAnn's to choose fabric, there were going to be 7 girls, including her, so that meant picking out 21 fabrics!  It takes one fabric for the main pillowcase, a coordinating one for the edge and a contrasting one for a flanged trim.   It sounded easy and fun going in, choosing what each girl might like.  But after a while choosing all those combinations became tedious.  K finally wore out and said they really didn't need the trim!  I ended up choosing them for her.  The problem was that we were making these out of nice flannels, and the selection wasn't as great.   We bought the fabric and I took it home and washed it, pre-cut it and make a little bundle of the coordinated sets to make it easier.


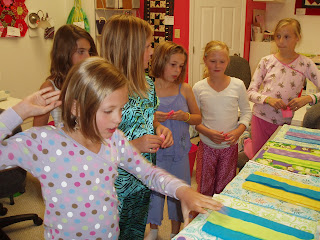
Birthday night rolled around and the girls were wound up!  They carpooled to my house/studio and came barreling in laughing and joking and just being girls.


They were excited to learn a new skill.  They took turns choosing which fabric bundle they wanted, and K was pretty close to being accurate in her assessment of her friends likes and dislikes.


I had all the machines ready, threaded and the speed turned all the way DOWN!   I demonstrated how to lay out all the pieces and carefully pin the layers together.


 And then to the machines.  No one, besides my granddaughter, had ever sewn by themselves.


So it was quite the experience and I was pleasantly surprised how well they really did.  Although I was glad my daughter came to help.


Teaching 7 young girls at one time took several hands.


 And of course, once done, K wanted me to embroider their names on them.  So while the girls played games and ate dinner and cake, I embroider their names on the pillowcase ends with my embroidery machine.


What a fun night!  One of the parents contacted me the next day, after her daughter went home, and asked what have I done?  Her daughter now wants a sewing machine for Christmas!!


And she got it too.  I think we might try to start a 4-H group with them this summer, and sewing is on the agenda.


I'll be posting a tutorial on making these Pillowcases.  They are SO simple and there are NO raw edges anywhere and NO serging or zigzagging the edges. It's like Magic!  Come back in a few days to see how to make these Magically Easy Pillowcases.

Saturday, January 01, 2011

We have a winner!

Congratulations to JayTee!  I put the number of comments into the Random Generator and had it choose a number--#5 was the result.
(this is the screenshot of what I did on Random.org)


JayTee was the 5th commentor, so she wins the FREE one year Subscription to the Quilt Pattern Magazine.


Thanks to all who commented and stopped by my blog.  Even if you didn't win, $11.99 is pretty good for a year's subscription to a quilt magazine.  I hope everyone embraces this digital format, sure would save on trees! And clutter!  And make it easy to find articles down the road!

I think I'm going to try the BOM Applique AND the Design Challenge--looks like fun!

and by the way..................

HAPPY NEW YEAR!!!!


(a note to MAC owners: if you are having trouble downloading and saving the magazine using Safari, try using Firefox.  Who knows what it is in the Safari browser that makes it tough, but it worked fine in Firefox.)