Wednesday, August 10, 2011

Working on Samples...

Edited note:  guess what I found in my DRAFT file?  I thought I posted this and didn't..so am doing it now. oops. forgive me. the heat has been unbearable this summer, rendering my brain useless. 

and the story continues...

Getting a line up on new classes keeps me sometimes busier than I want to be!  But it's fun to try out new fabrics, try new patterns or ideas and keep it all fresh not only for my students, but for me.  I'm trying something a little different this fall.  First of all, I'm making up kits.  I went out on a limb and purchased 10 bolts of fabric for re-sale and it hasn't exactly flown off the shelves.  They all clamor for kits. So...kits it is.

The second thing is I'm making smaller projects, instead of a lot of bigger size quilts.  It's just so hard for everyone to get them all done.  So, if we make smaller projects...as in pillows...they might get them done. And get a chance to try out a new technique without being fully invested, fabric OR time, in a technique they will not like.

and for a little teaser of what I'm working on...


Tuesday, August 09, 2011

Kayaking with dolphins

my Granddaughter was out this morning with her Dad in Pawley's Island and then came across a group of dolphins. She caught it all on film.  Get past the first few minutes and then you'll start seeing them.

Project Fail

Do you ever have those?  I have my share of them and you don't often see people post them...because...well, it's embarrassing.  Here I am the teacher and the students all think I don't make mistakes.  Well...I'm telling ya. I DO!  LOL

I saw a great Scrappy Wheel pillow (I can't find the photo now), but I thought I knew how I would do it.  Okay, I admit, I forget my geometry now and then and this was a biggie.


I would be the first to admit that I don't mind a little wonky in my quilts. I think it add a lot of personality.  But for a class project?  that was NOT supposed to be wonky?  I just cut little strips and sewed them to a circle. Well, hello!  I should have cut wedges. Too late now.  I might cut it up and use it for something else, but it's not going to make it as a pillow.  

Plan B


Get out the Dresden ruler....forget the points and curves...and there ya go.  But not 2 layers. Oh well, next time.

A little better, my stomach feels better. 


The other one?  just a little too...off kilter

Monday, August 08, 2011

dreaming and creating...

After taking 4 grandkids to the beach for a week break, I am back...

dreaming....

and creating...


I am on the downward slope of making my samples. it's going to be a 

PILLOW MANIA!

Why?

*pillows are hot right now
*they are inexpensive to make
*you can use scraps leftover from your quilts--no NEW fabric, unless you want to!
*it's a great way to learn a new technique without a huge investment of money and time
*they make great gifts
*it's a great way to practice machine quilting skills
*who can't use more pillows?
*I'm making pillow covers so only ONE pillow form needs to be purchased, if desired
*Learn several ways to make pillow cover backs (psst..zippers are involved and they are E-A-S-Y! I pinky swear!)

I'll be posting some here and also at my website as I make final decisions.  Stay tuned!


Saturday, July 16, 2011

Guess what I found in Israel?

heehee....and I wasn't even looking! I promise!

I recently went to Israel on a 2 week tour and my oh my, what a trip!  It was a lot to take in..from the geography, the archaeological digs, the Bible study learning, the people, the history, the flowers and climate. It was almost information overload.  We didn't get a free day until day 11.  It was when we stayed inside the Old City of Jerusalem.  We went back to a few favorite places, explored some on our own and of course, did a little shopping.  There wasn't much shopping on this trip as it was mostly a Bible Study tour, but we did sneak a bit of souvenir shopping in.

and here is what I found along the way....


GET OUT OF TOWN!  and they had some 100% cotton!


Yep, I did buy a meter of it.  It wasn't really my style, but honestly, how can a quilter be so far from home, in a foreign land and NOT buy fabric when it practically jumps into your hands?  Not sure what I'll do with it yet but I have some for my collection.  And I honestly thought I would not find fabric of any kind, let alone cotton.


Monday, July 11, 2011

working on samples

Summers used to be laying around the pool, drinking Sweet Tea, and catching up on all my reading.  Those days are long gone...now I worry about getting flimsies quilted in time for my quilt show (this August 27) and samples for my new fall classes.

I tried, I really tried to sew these while sitting in the sun.  After wiping sweat off my arms--ewww--I decided that sewing in the Air Conditioning is MUCH better!  I don't know, maybe I'm getting too old to sit for hours in the sun. Heck, I can't last a half hour anymore.  Safer for my skin anyway, at least that's what I tell myself.


And while I was on a roll making hexies, I decided to follow a simple little tutorial to make this needle case  found on My Three Sons blog (it's on her side bar).  

(Editor's note: is anyone else having problems with being able to copy and paste URL's in the link part?  I can't get it to paste and I just can't remember that much)


and the inside.... (I used Warm and Natural--that's all I had and I wanted to make it NOW! Do you ever do that? Get a little burr in your behind and make something with whatever you have? Just wondering..)


Sunday, July 10, 2011

Floralicious

And it is de-lish!  Called my name the minute I walked into Quilter's Cottage (in Garden City, SC)!  Made by Benartex.
Medium size version of the main fabric.  It has a large version where the flower motifs are about 4-5" and a small version.  I got all three :)


Here is the stack I got...some stripes, a polka dot, some motifs on different backgrounds and several colors of the "petal" pattern. 

I'm sure glad I got this...I was running out of fabric! 

ha-ha-ha-ha


Sunday, July 03, 2011

Fresh Fabric Treats book

Congrats to Vickie of Spun Sugar Quilts for her inclusion in the book, 'Fresh Fabric Treats' of Moda Bake Shop designers.  She had a book signing at our friend Pat's shop, Quilter's Cottage in Garden City, SC yesterday.  We don't get to see each often in Ohio, but seem to have time while we are both in SC!


Here I am with Vickie and our other friend from Ohio (now in SC) Marilyn.

Way to go Vickie!

Saturday, July 02, 2011

20 Minute iPad case

Are you lucky enough to have an iPad 2?  My hubby surprised me with one, and I had the first generation one!  I loved my first iPad and I just recently had purchased a keyboard/case for it and now none of it fit. The new iPad came with a 'smart cover', but it seemed like it was still a little exposed and unsafe.  I wanted to make a case for it, but didn't have a lot of time.

Walking through Kohl's the other day, I spotted a placemat and I immediately thought it would make a great case--nice and springy. And it was on sale for $2.00!


It only took me 20 minutes and that's even with a minor revision I made.  I wrote up this little tutorial in case you were interested in making one too.

20 minute iPad case tutorial

Supplies needed: one (1) placemat, preferably with with fringe
Metal measuring tape (from the Dollar Tree)
cheap scissors
painter's tape or masking tape
sewing machine with thread to match placemat


1. To create casing: with placemat laying face down, fold over each fringed edge 1 1/4"


2. Pin and stitch close to edge. 


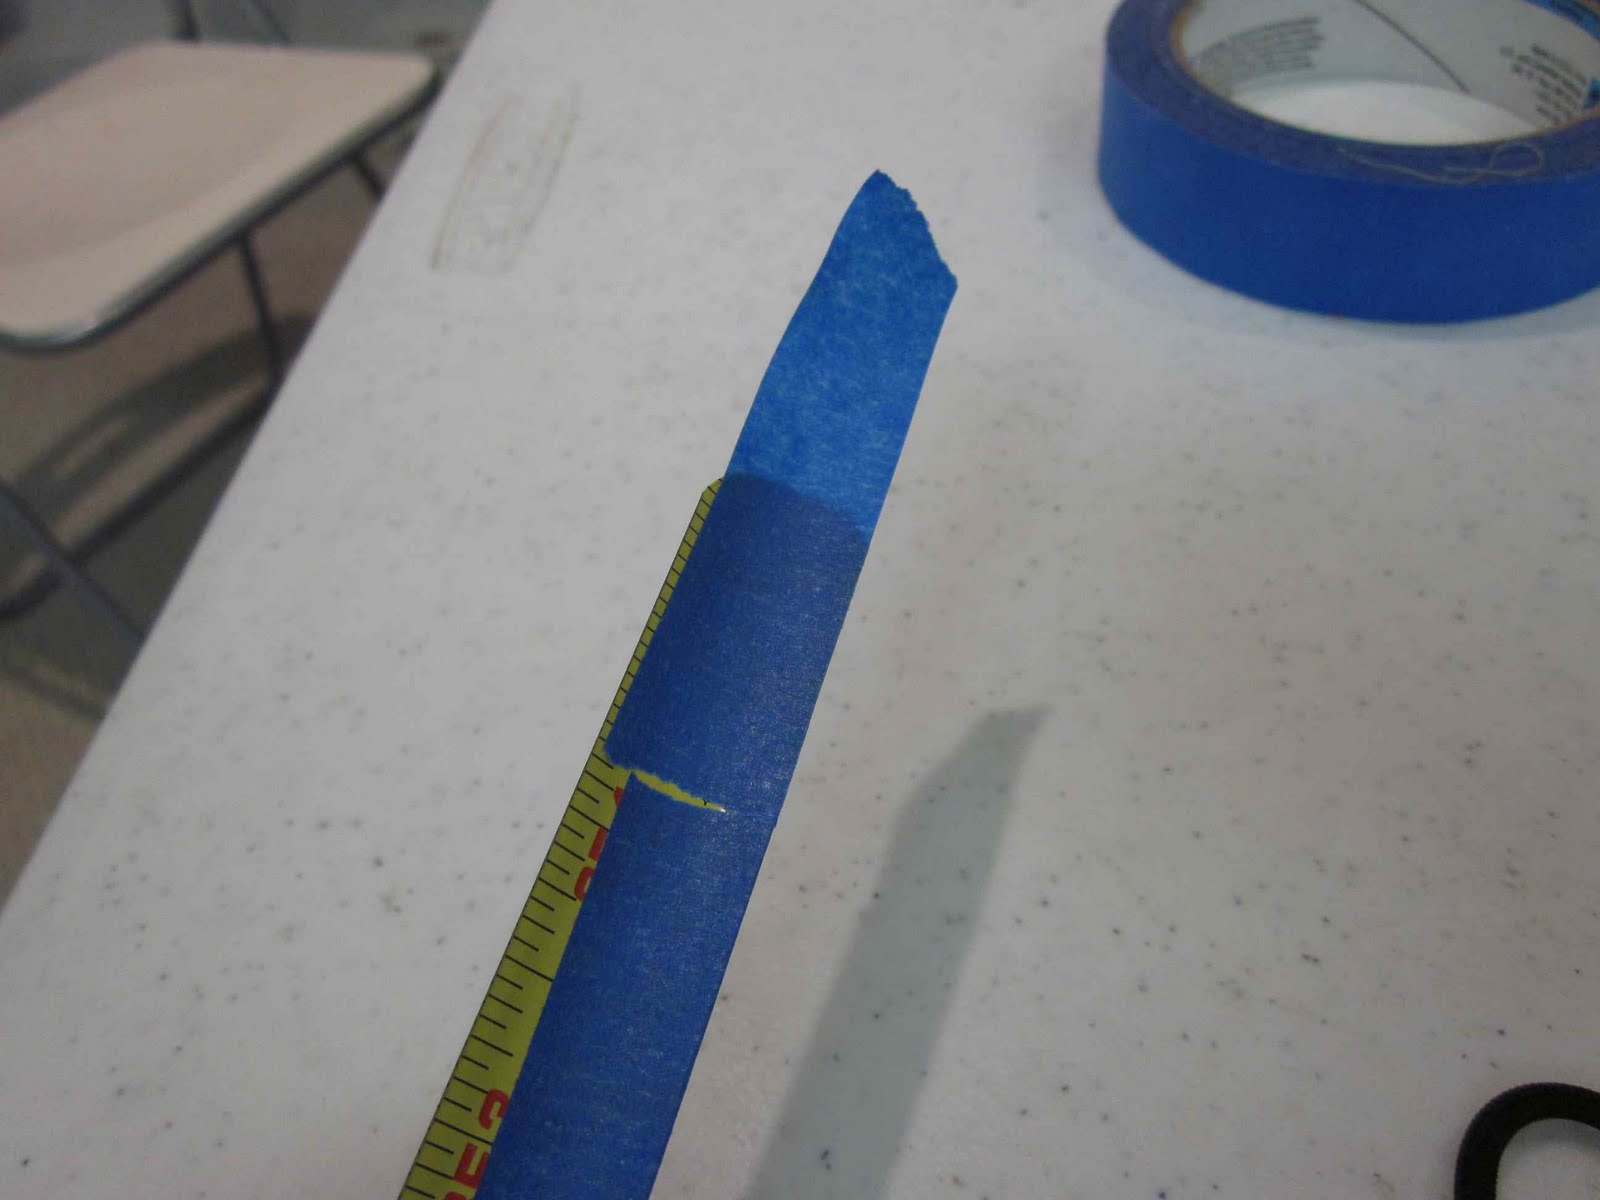
3. measure the width of the placemat and cut a piece of your metal measuring tape 1 1/2" smaller than that measurement. Cut a total of 4. ***

(see my edited note below--you may want to cut down the placemat at this time)
TIP: make sure to LOCK the tape when you cut it because you no longer have the 'stop' thingy on it. You might have to disassemble the tape measure if you don't, just sayin'. 


4. Round the corners on each cut edge to prevent the sharp edges cutting through the fabric. 


TIP: make sure when you round the edges to do it slow and smoothly, catching the little bits that you cut off. If they land on the floor...they are VERY sharp and have been known to go into your foot!


5. Tape two of the cut pieces together to give it more strength.  Make sure to cover the cut ends with tape, as the ends are still sharp and can wear on the fabric otherwise.  Make 2 sets. 


6. Insert one set of taped units inside the casing, making sure the numbers face the inside of the bag. If you don't put them in the right way, the bag will not 'snap'.  Repeat for other side.


7. Fold the placemat in half, wrong sides together. (Yes, I know this seems odd, but the placemat I had was a little thick and sewing it right sides together and turning inside out would have made it really bulky.) Pin the side edges.  Make sure the measuring tape is not in the way of the seam allowance.  Stitch with matching thread close to the edge, back stitching at the top and bottom. Stitch again for added strength. Do both sides. I only used a straight stitch as the edges were already finished. 


8. You are done!! Now, wasn't that quick?

Two weeks later.....

9. Although I knew when I was making this case, it was a little long, but I thought it would make room for the cord or something extra, but I just didn't like it.  The reason I made it that long was because the edges of the placemat were finished and I didn't have to do anything extra to them. 


 But I decided it was worth cutting the extra off and stitching with a zig zag to finish the edges. I used a matching thread, so it really doesn't stand out too much and I like the size MUCH better. 

see left side stitching? nope, didn't think so! 


Here is what I did:

I cut the placemat bag 2" longer than the iPad, being very careful when cutting through the measuring tape. 


Remove the measuring tape, recut it to a size that is 1 1/2" less than the width of the cut bag. Round the new cut edges and re-tape.  Sew up the cut edge with a zig zag stitch and repeat. 

Thursday, April 14, 2011

T-shirt quilt for softball player

I just finished another T-shirt quilt for a softball player...

It's funny, I do several of these a year for people (mostly softball players--hmmm, imagine that?) and I end up using the same color for sashing in almost 80% of them.  

Here is my choice of colors:

{Hot Pink}   {Red}   {Royal Blue}   {Bright Yellow}  {Almost Lime Green}


{Pink}  just didn't work for me.  Not enough of it in the quilt?
{Red} might have been okay if it would have been brighter, but that didn't thrill me either.
{Royal Blue} Okay, I admit. My 'go to' color.  It seems to recede into the background without clashing with any of the shirts and allows the T-shirts to come out and shine. 
{Bright Yellow} Got your shades?  Whoa--I'm the first one to admit I love bright, intense colors, but it was trying to take all the glory when it forgets it is all about the T-shirts! Sorry yellow, I really wanted you.
{Almost Lime Green} it was the 'almost' that got me.  It just didn't quite get it with the other lime greens in the quilt. 

So, Royal Blue again makes it's appearance in my T-shirt quilts. It just seems to be the most unassuming choice and allows the shirts to stand out. 


I use a heavy flannel for my sashing and backing. First of all because it is more the weight of the T-shirts and it makes it a nice snuggly quilt.  I use Warm and Natural cotton batting.  I quilt it with a gray thread in a large-ish overall meander.  It's not about the quilting here..it's all about the shirts. 


This young lady had a number of shirts that had designs on the back, including several that had the names of participants. So I just chose a few and added a row on the back. 


I have seen several awesome Tshirt quilts, but this is the most basic one that I teach and also do for hire, as it's the most economical.   I'm working on a tutorial now.  

This is a great shirt...thought I would share it...guess who is a catcher? 

Wednesday, April 13, 2011

Happy 1st Birthday to my last granddaughter

What a dear little girl she is....and the most beautiful eyes.  And she just takes it all in with a smile with 2 little teeth...Happy Birthday Precious Little One..
Wouldn't it have been nice to have the actual photo instead of taking a photo of a photo?  :)  Getting photos from my daughters is like pulling teeth sometimes!  And they don't even have to go to the camera shop, turn in a negative, order a print and wait a week!  So I do the next best thing..take a picture of a picture!  I should have just taken it off the wall. heehee


Nana is making her some headbands and clips, I can't believe how long her hair is!  Sad to say, it's longer than her sister's, who is 3 1/2 and decided that cutting your hair is fun! But that's another story!

PS..I love that you can Photoshop 'food off face' rather easily! just sayin'....

Saturday, April 09, 2011

Portable Ironing Table Tutorial

I have made several of these already and wonder why I didn't do more sooner? 


 They are SO handy to have by your side when you are sewing and it doesn't take away precious space on your sewing table. PLUS, it GIVES you extra space if you need it.


  If I don't necessarily need an iron at my side on a particular day, I put my small cutting mat on it.  Or just to have more space. Period.

This is embarrassingly simple.  It takes about 5 minutes to do. It will take you longer to shop for the supplies than make it.

Portable Ironing Table Tutorial

Supplies needed:

Wooden TV tray (mine came in a set of 4, but I have seen them sold individually as well. I've also seen them at Goodwill--and not thinking, I didn't buy them! Slap on head!)


Electric Staple Gun with staples (or you can use a non-electric staple gun as well--just don't bother with a regular office type stapler, it just won't work!)

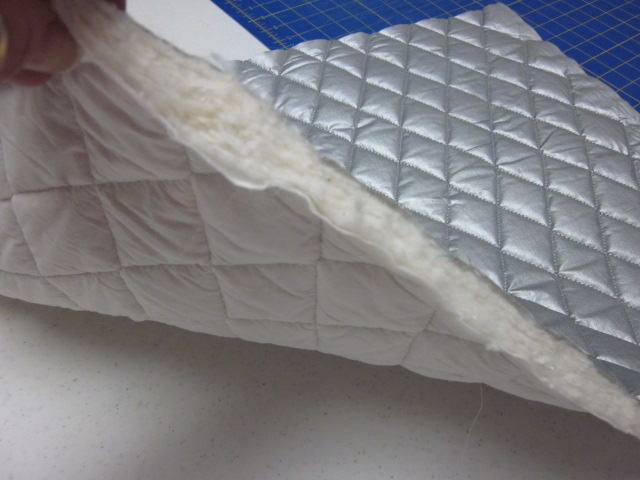
1/2 yard of Insulated Teflon cloth (ironing board cloth that is already layered with thick batting and a lining)  I found mine at the larger JoAnn's ETC stores. If you don't have one nearby, you can order it online or use regular Teflon silver cloth and a few layers of Warm and Natural.


Are you ready?

1. Cut your Teflon cloth about 2.5 to 3" larger on all sides of your wooden TV table.


2. Starting on one side, with the table upside on the wrong side of the cloth, wrap the Teflon cloth around the tray and staple. Staple the entire side. Don't be stingy with the staples. They're cheap.


3. Go to the opposite side of the table and staple that side down.


4. Repeat with the 3rd and 4th sides, leaving the corners for last.


5. Corners: the insulated Teflon cloth is really thick.  I just grabbed the corner that was left standing up and pulled it up tight and stapled. It kind of made it's own pleat. I just made sure that I put more than one staple in the corners.


6. Turn over and enjoy!

Now, wasn't that easy?